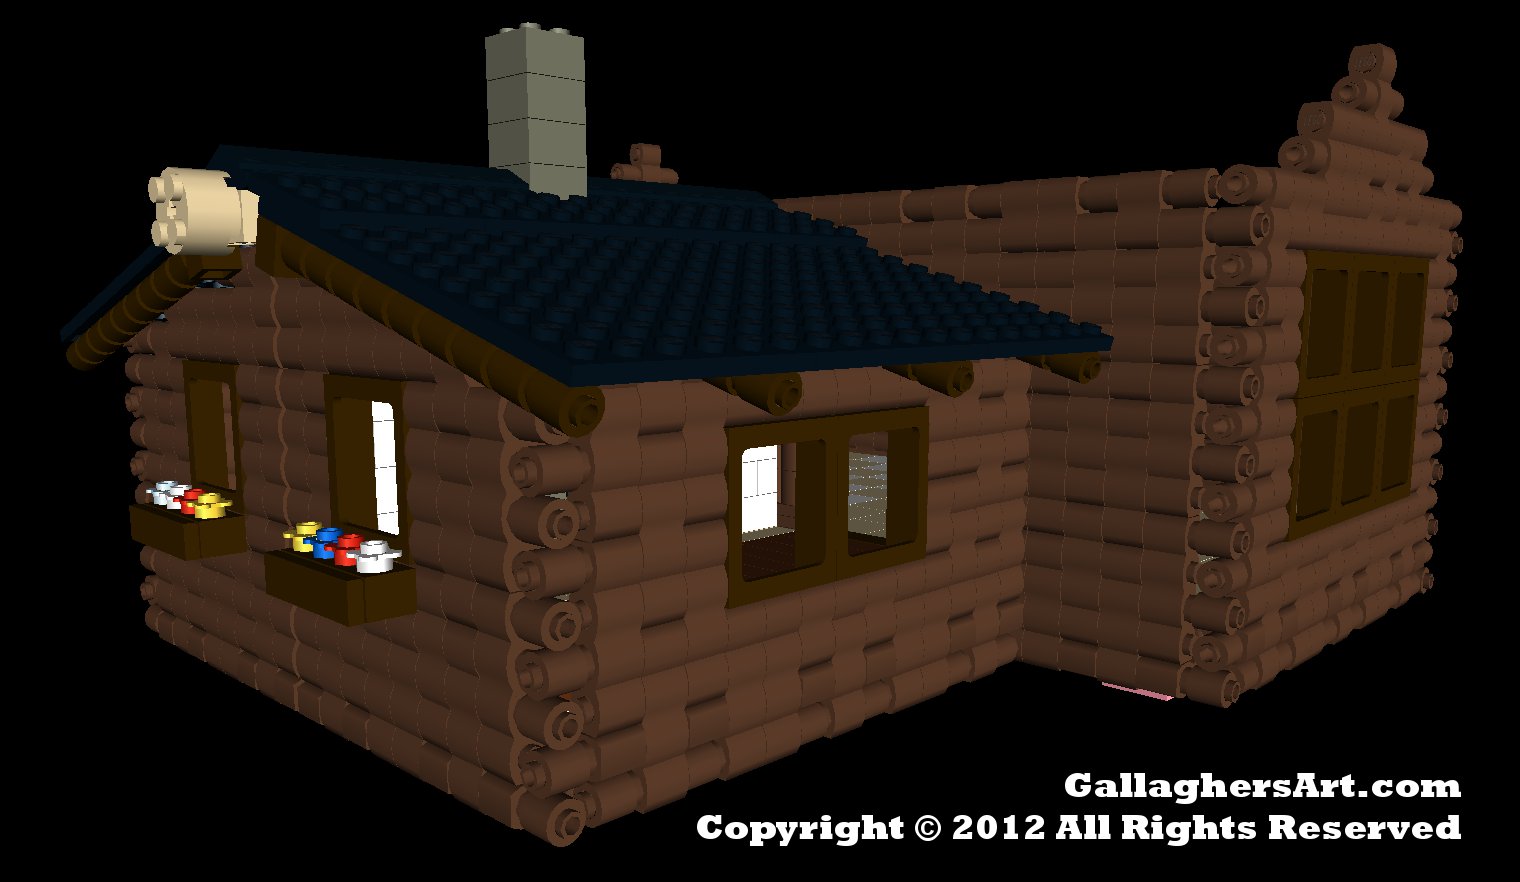

So a little while back LEGO finally came out with a LEGO Log Cabin set, unfortunately, I personally was let down by the fact it was a brick cabin attempting to look like a Log Cabin.
I think the reason was building a Log Cabin like the ones I build may be too hard for younger humans, but I think anyone could build as I do, just need a little help.
In the past I just gave LDR files for examples for others to build from, today I will go over the mechanics that make up my original LEGO Log Cabins designs.
Under the floors
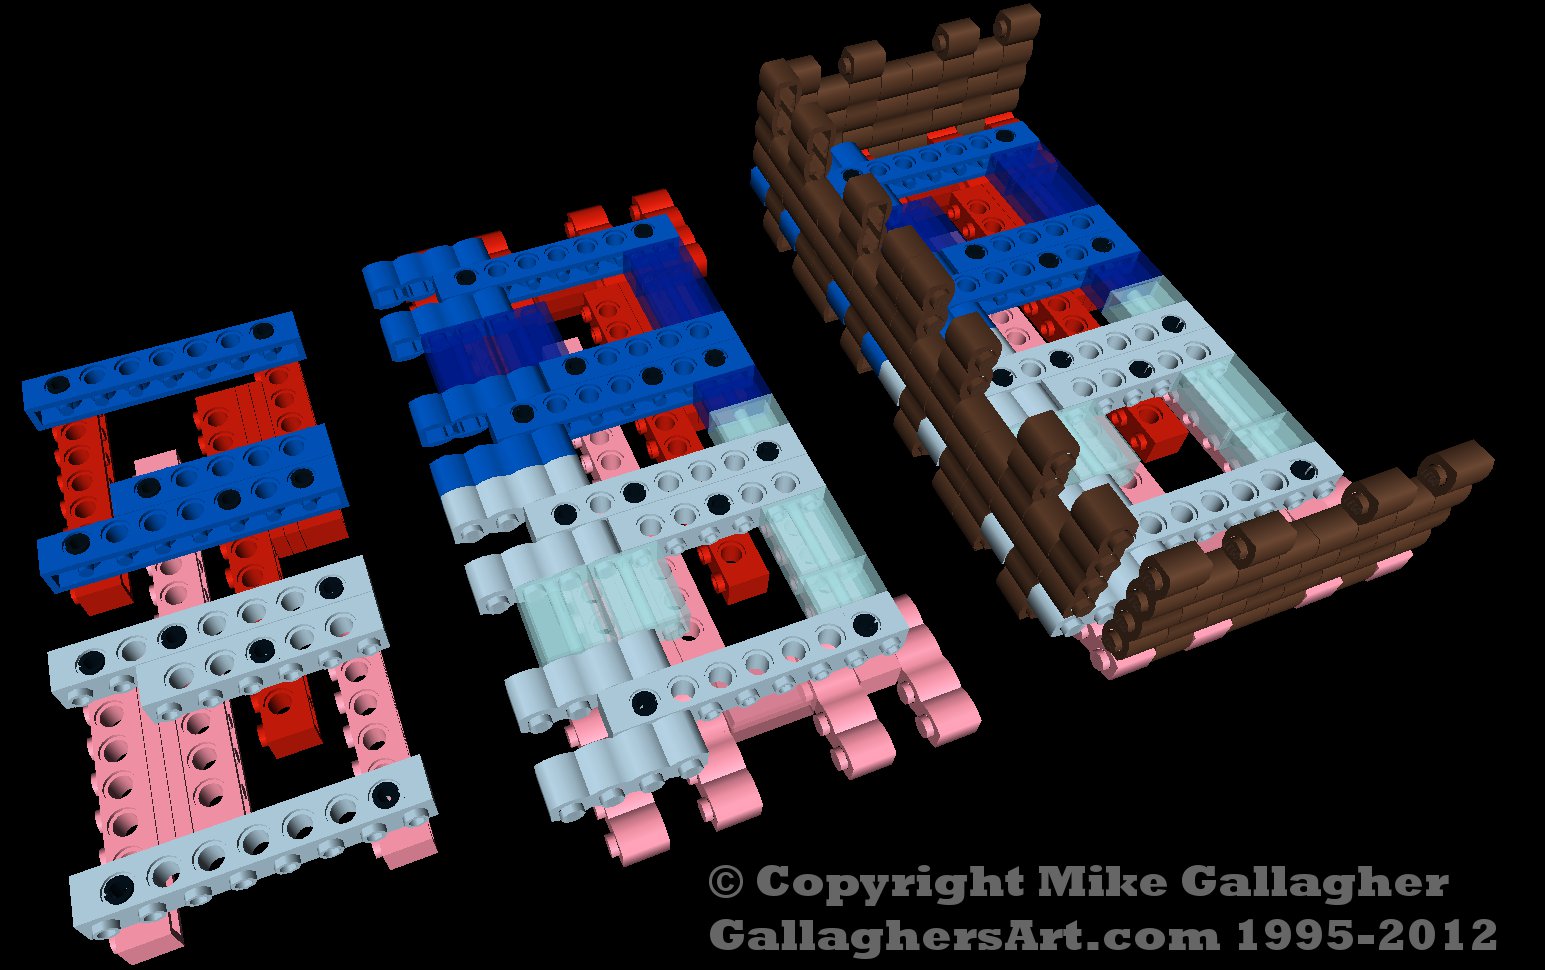
The substructure under the MOC’s floors is what makes us able to place the log bricks on their sides for the walls. And with the bricks on the sides give the true look of a log cabin.
Hidden out of sight from the finished MOC’s are 2 Technic bricks layers going vertical and horizontal to each other. These bricks are on their sides under the MOC. Then the log bricks are attached at 90-degree angles at the end of these Technic bricks to make up the walls of the Log Cabin.
Corners
The main visual aspect of this design is the logs joining at the corners as Log Cabins as they overlap each log layer. I personally like having the top of each brick facing out for the corners, or at least the most viewed angle of the finished MOC. But the corners can have the wall directions go anyway, so you can view the studs or the bottom of the bricks.
To have the studs displayed on al corners requires a little more work than I will go over later.
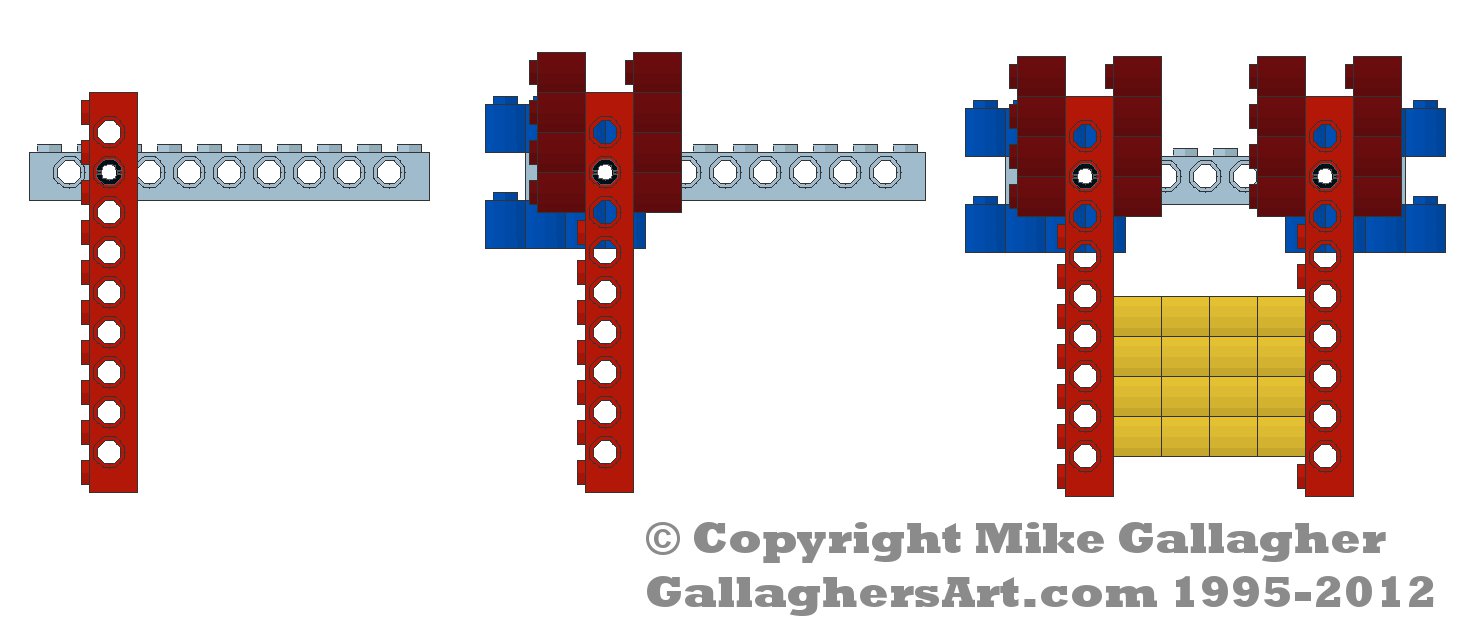
Keep the basic LEGO math in mind; keep 4 bricks between every Technic brick, and corners walls are attached using the 2nd Technic hole for each layer.
At the ends of each Technic brick that will have a wall attached place a 1x4 log brick with a single stud going past the Technic brick, attach one of these to both sides of each Technic brick. I also place 2 bricks between the log bricks to lock them into the design (not displayed in this picture).
The Log Cabin walls will attach to the single log studs that protrude past the Technic bricks.
Then use a Technic pin to attach the front and side wall supports together.
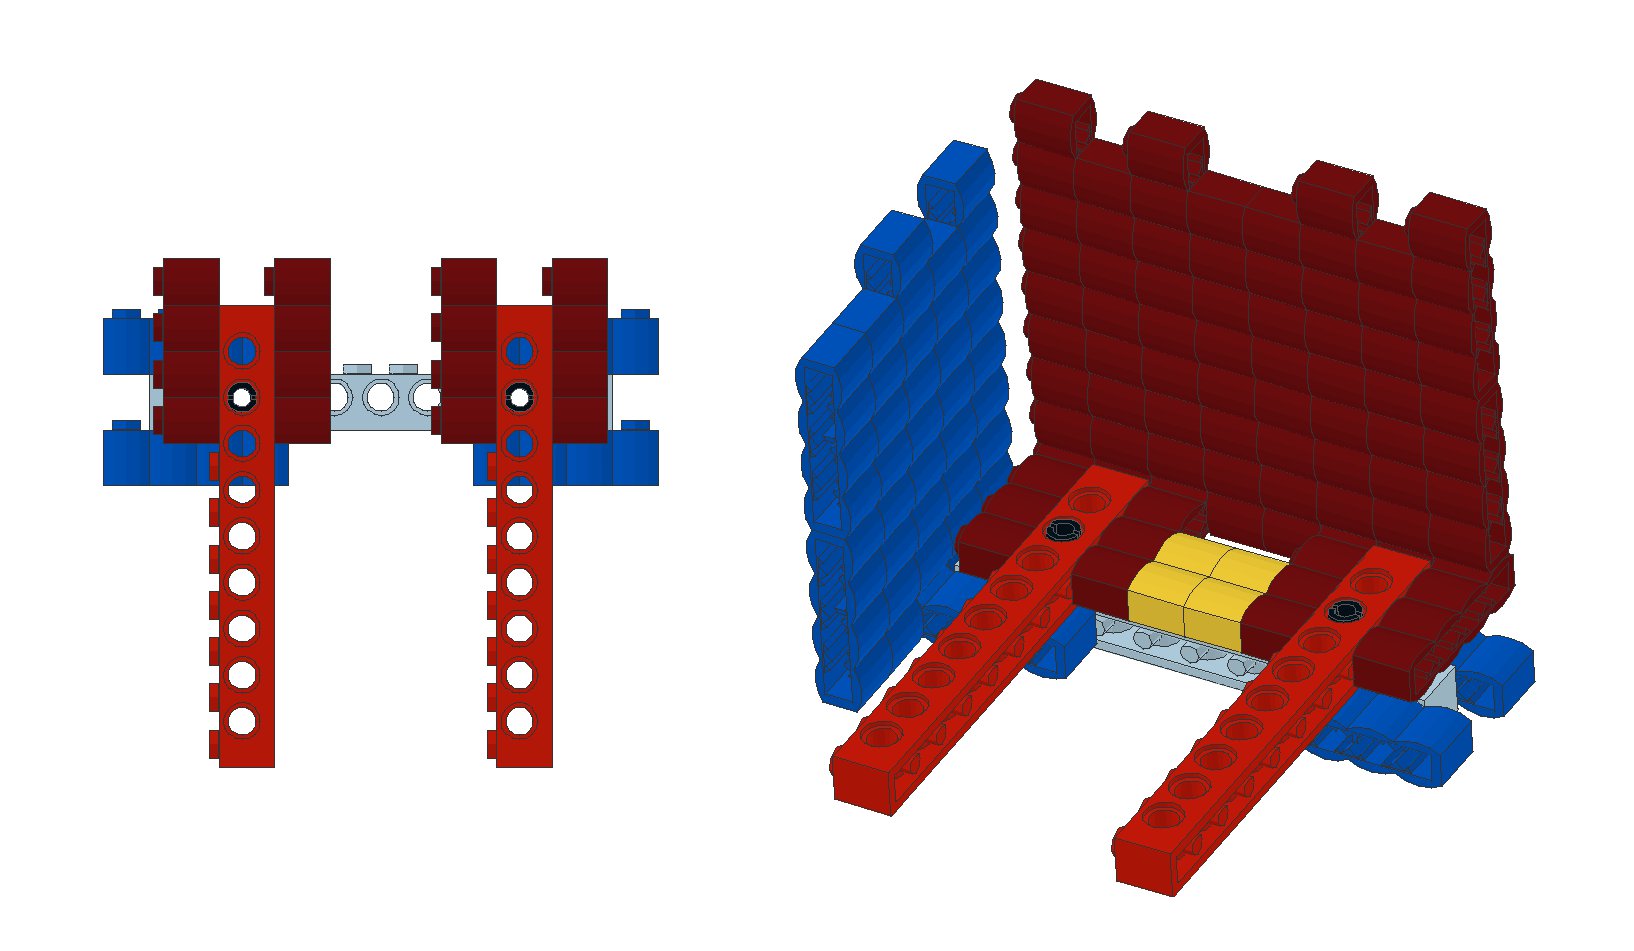
Studs facing out on all corners, with a minor gap in the wall
If your planned LEGO Log Cabin MOC requires studs facing out on all corners a little trick is required. With this modification, the MOC will be larger. Basically, you will need to flip the layers of Technic bricks so that studs face out on all sides.
Unfortunately having a wall with studs facing out on both sides has some limitations. The first and easiest solution will leave a very little gap between the opposite brick orientations. You can use this gap for a good purpose, making it the location of a fireplace, or joining 2 modules together for a MOC that can have easy access to the insides (pull apart modules).
Still keeping with the 4 bricks between each Technic brick applies, making the inner Technic beams being separated by 2 bricks and a small gap. The lower Technic layer would be continuing, and if the MOC would not be modular then the lower layer can be a single beam.
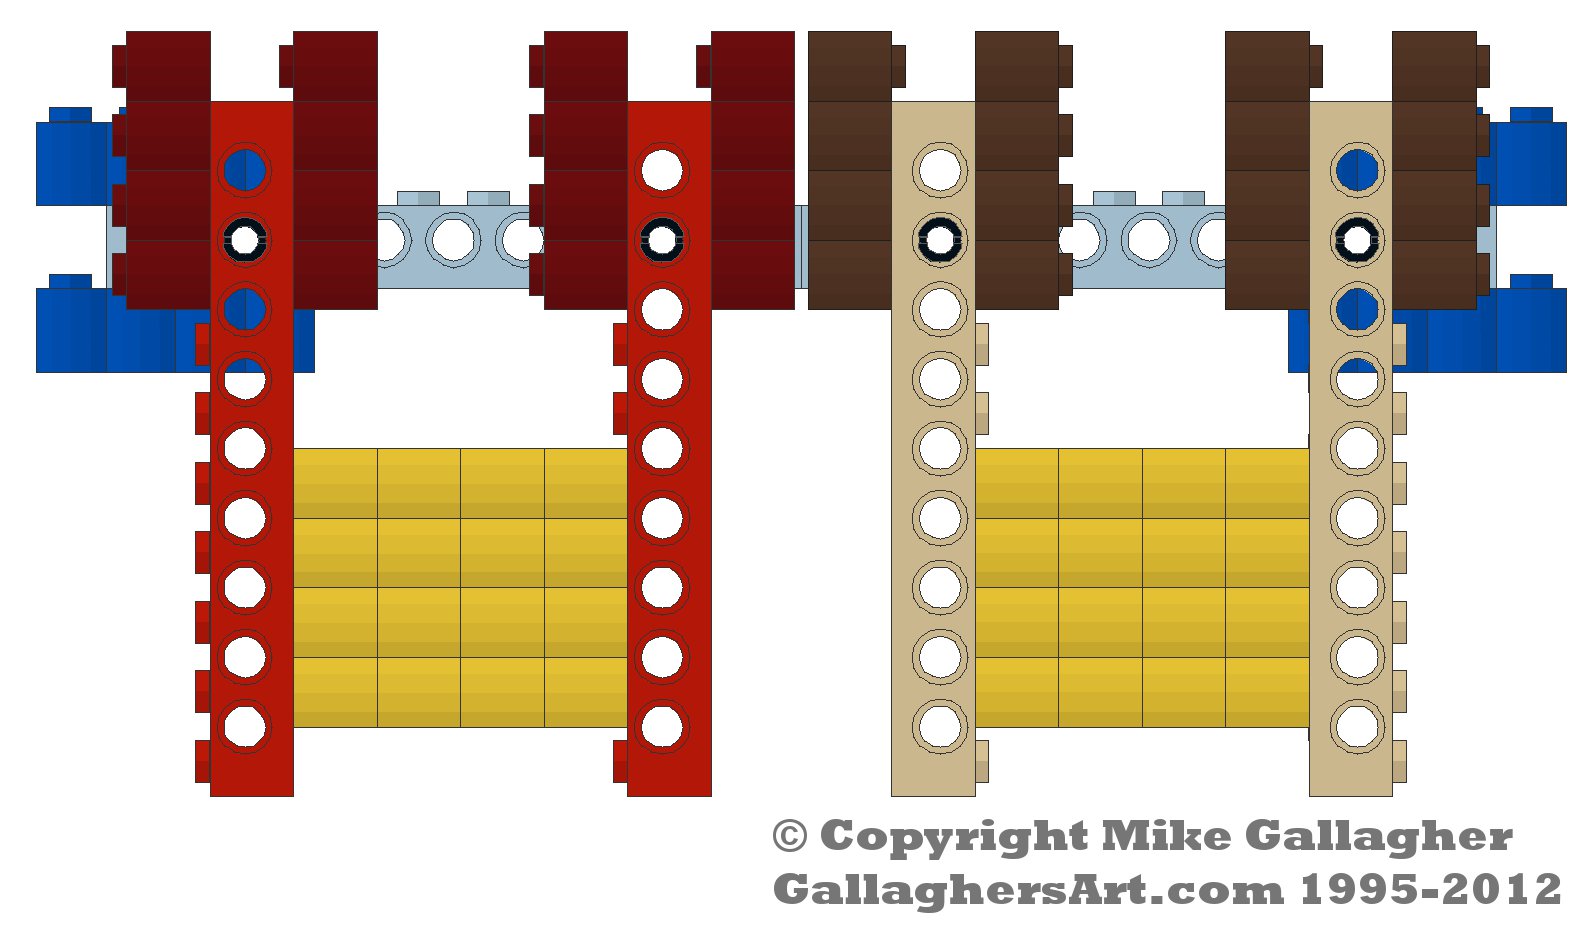
Studs facing out on all corners, with NO gap in the wall
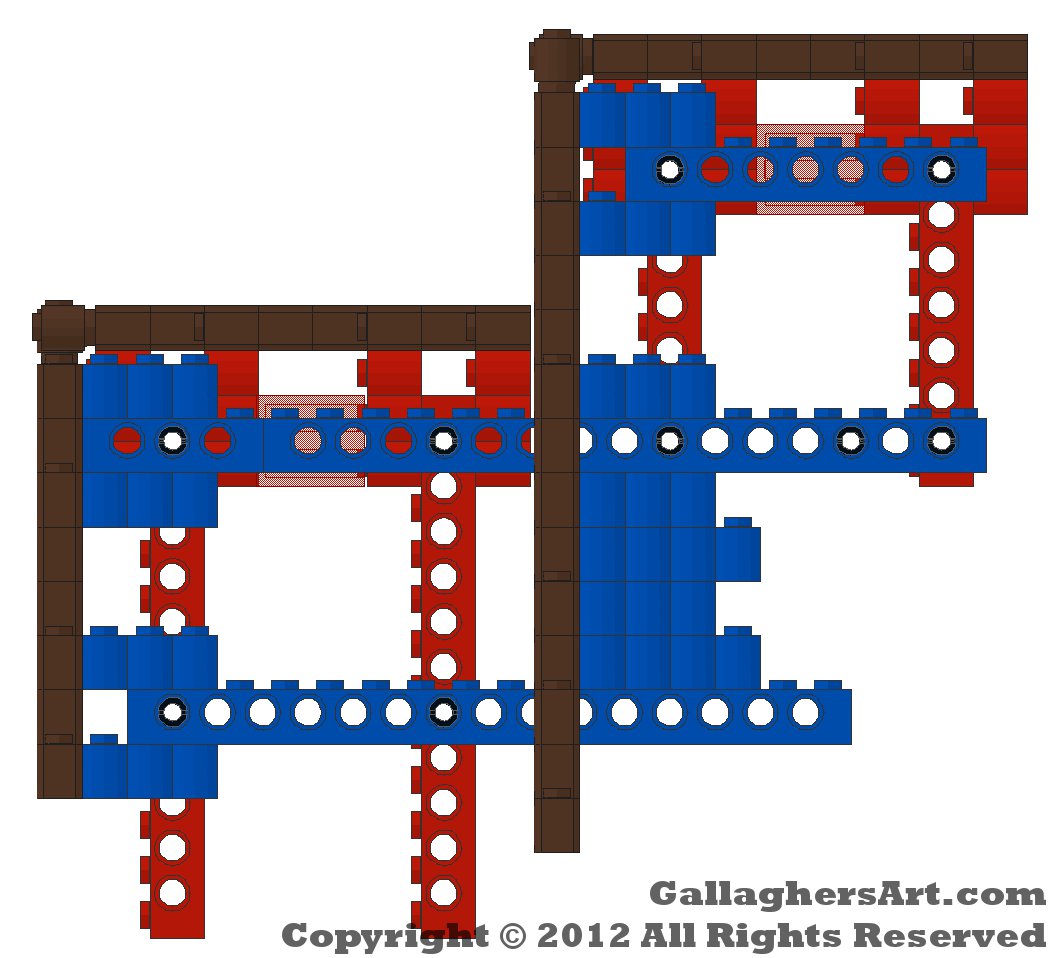
If your MOC design requires no gap between the bricks that face opposite directions for the walls this is how to do it.
This is only half of a building, just double your design, could be one module or 2.
Basically, the lower layers would require some added attention.
In the above picture, each different color is a different part of the MOC. Use any color you want, I just used these for the images.
The way these 2 layers interconnect keeps everything locked tight. A bit complicated but doable.
The main drawback is the odd shape for the floor. The gap we removed from the walls is now taken out of the floor space. So once you lay down plates this is the remained gap… If you find a better solution please let me know.
Windows
To place windows in the MOC you can use windows that Lego makes but still look right when placed on their sides.
In some location, you may find a single stud width missing. You could place a 1x1 round in these spaces or create a window sill, or window flower plot.
You could also lower some of the 1x4 log bricks so they line up, drawback on this would be a deeper base under the house.
Wall and Doors
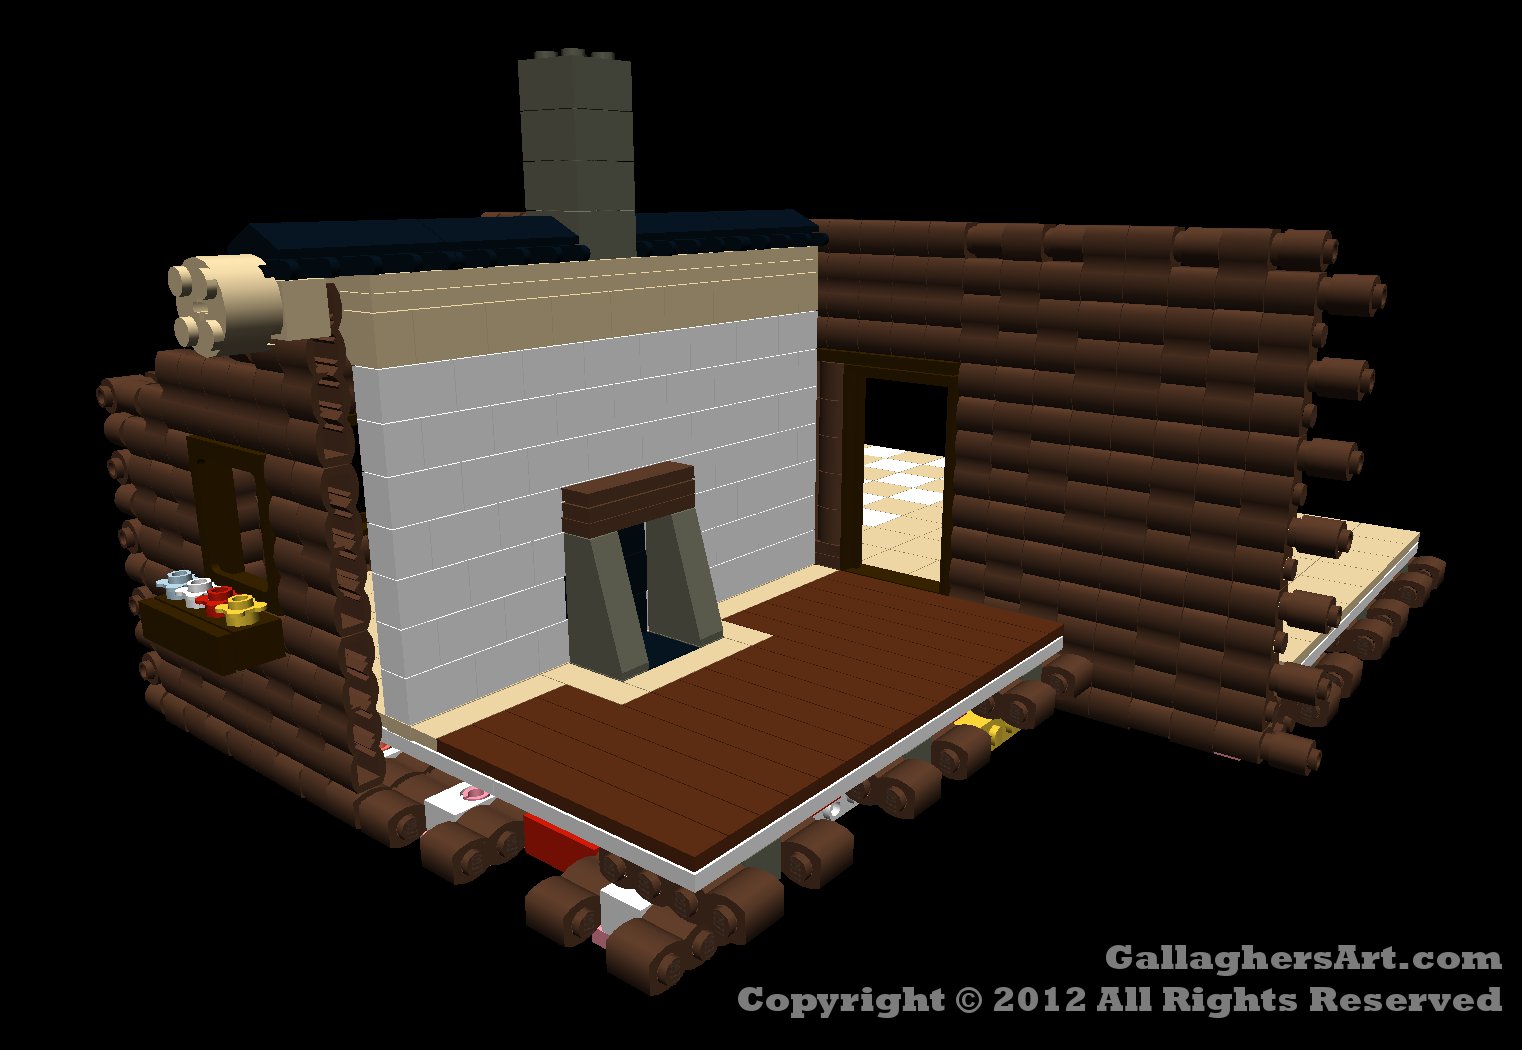
There is not really a solution for doors on their sides, so I end up doing some anti-SNOT, meaning I place doors and a small wall portion on the floor.
I also attach Fireplaces and minor non-log brick walls. And tile the rest of the floor.
Walls attached to the floors could support a roof.
You could also continue the stacked log look for internal walls, Will go over that next.
Inner Log walls
If you keep to the 4 bricks between each Technic beam making inner walls is simple.
Just think of placing 2 separate cabins together so they share a wall. That’s it.
Enjoy!
`mike
LEGO® is a registered trademark of the LEGO Group of companies and does not sponsor, authorize, or endorse this site.
